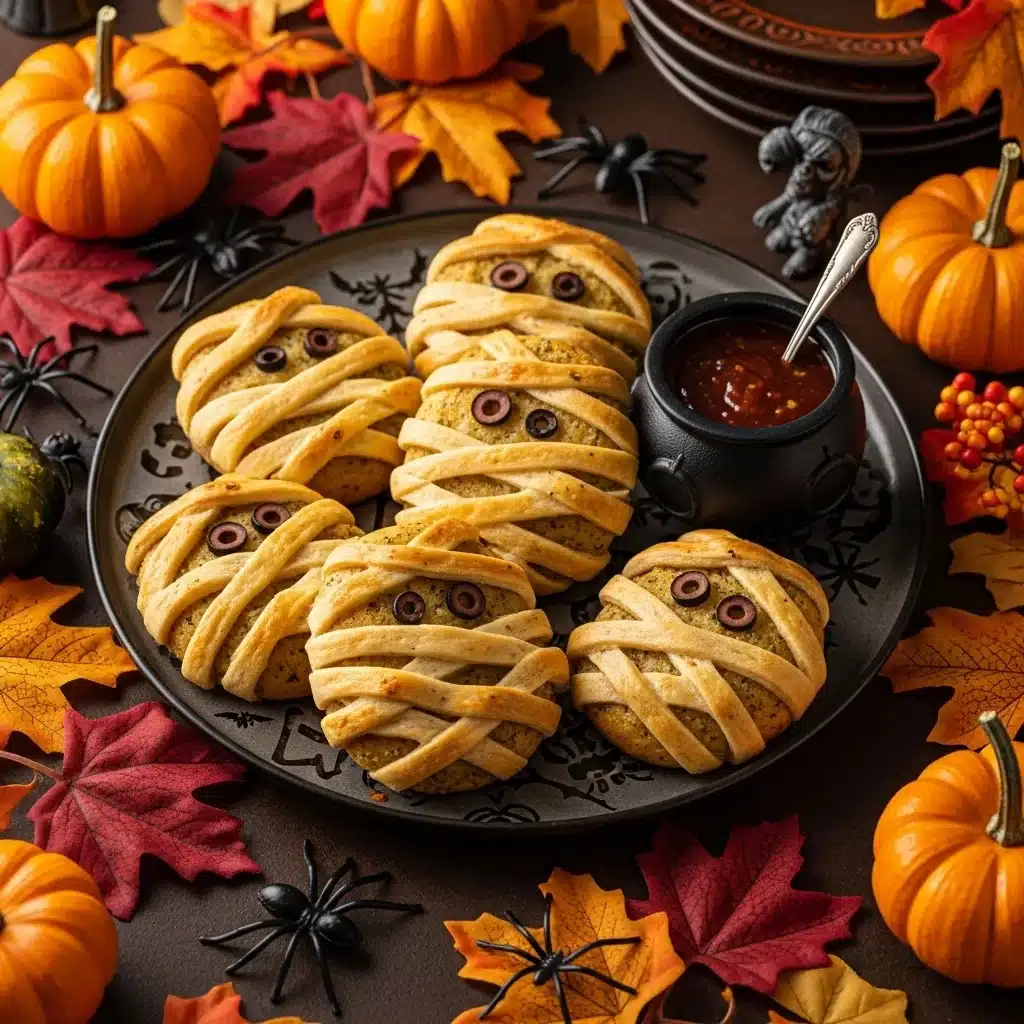
If you’re looking for the perfect blend of spooky and delicious this Halloween, mummy garlic bread is your go-to recipe. It’s fast, festive, and a guaranteed crowd-pleaser. Whether you’re hosting a haunted house party or just making a fun dinner for the kids, this cheesy garlic bread dressed up like a mummy adds a playful touch to your menu. With gooey mozzarella, buttery garlic spread, and those adorable black olive eyes, it’s more than a snack, it’s a conversation starter. In this article, I’ll walk you through how to make, serve, and store this Halloween garlic bread everyone will remember.
Why Mummy Garlic Bread is the Ultimate Halloween Treat
Halloween Garlic Bread Tradition with a Twist
Hi, I’m Marlene Quinn, baking from my cozy Mendocino kitchen where fog rolls in with the scent of sourdough and butter. One crisp October evening, my kids and I turned our regular garlic bread into little edible mummies for a Halloween movie night. It was messy, silly, and absolutely perfect. Since then, mummy garlic bread has become a Halloween staple, because nothing beats buttery bread wrapped in melty cheese with tiny olive eyes staring back at you.
This recipe isn’t complicated. If you’ve got a loaf of French bread, a few mozzarella sticks, garlic, and butter, you’re halfway there. It’s what I call a “low-effort, high-wow” kind of bake, ideal for beginners or little helpers eager to decorate their food. That spooky-yet-sweet look brings instant Halloween magic to the table, and it tastes even better than it looks.
Not only is it comforting and garlicky, but it’s also the perfect hands-on kitchen project that creates memories along the way. Trust me, mummy garlic bread is way more fun than carving pumpkins, and a lot tastier too.
From Scary to Scrumptious: Mummy Bread for Parties
Mummy bread isn’t just for family dinners, it’s the life of any Halloween gathering. Whether you serve it at a kids’ party, a spooky potluck, or as a surprise lunchbox treat, it disappears fast. I’ve made these for our open-mic bake nights at Marlene & Crumb and watched people of all ages fall for their charm.
Want to really turn up the Halloween vibes? Serve these alongside a blood-red dipping sauce (read: marinara) or next to Halloween Cake Pop Flavors for a sweet and savory combo. You can also balance out the savory with a slice of Sourdough Garlic Toast on the side.
From spooky snack to standout centerpiece, mummy garlic bread is proof that Halloween baking doesn’t need to be sugary to be sensational.
Print
Mummy Garlic Bread – Ultimate Easy Halloween Favorite in 30 Minutes
- Total Time: 22 minutes
- Yield: 12 servings
- Diet: Vegetarian
Description
This mummy garlic bread recipe is cheesy, spooky, and perfect for Halloween. It’s quick to make, kid-approved, and always a party hit. Thin strips of mozzarella mimic mummy wrappings while black olive slices create those adorable eyes. Whether you’re serving it as a snack, appetizer, or alongside a cozy soup, this Halloween garlic bread brings festive fun to your fall table.
Ingredients
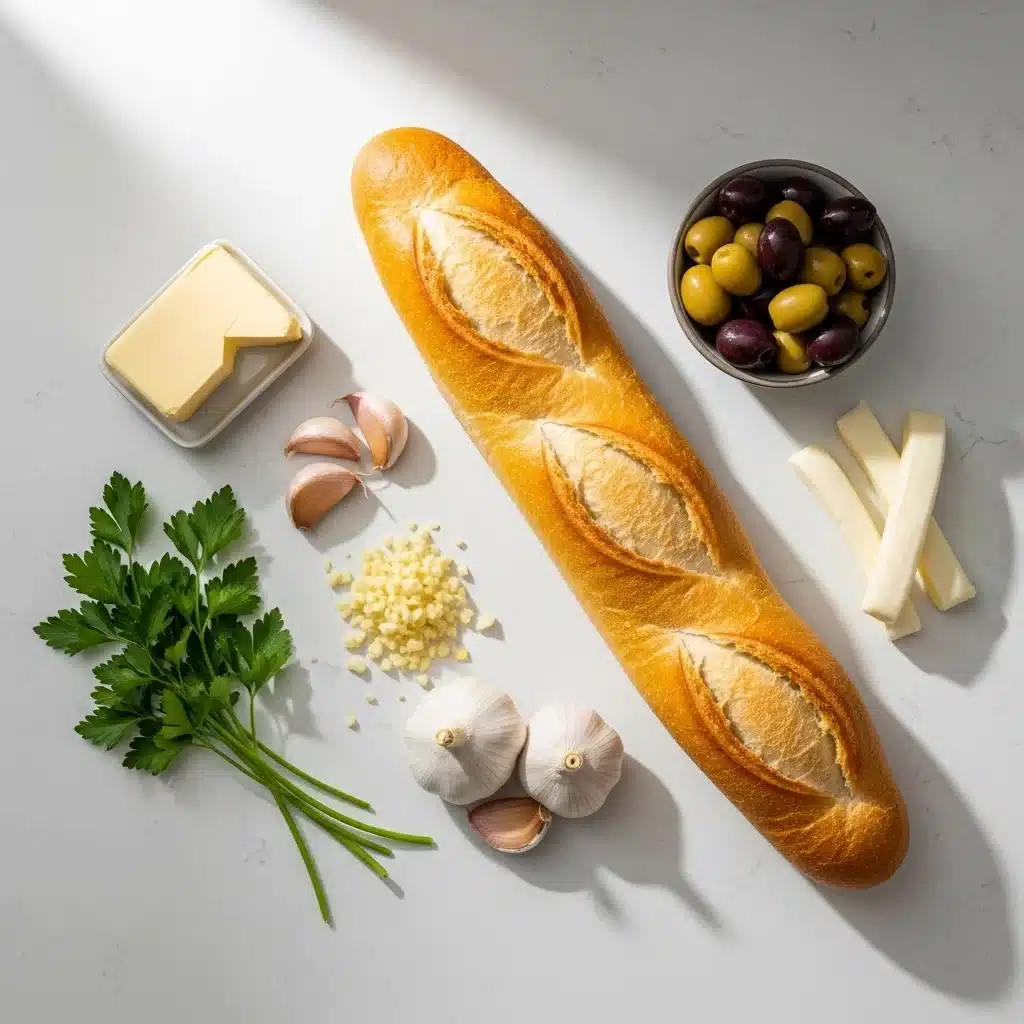
▢ 1 French bread loaf
▢ 1/2 cup butter, softened
▢ 2 tablespoons fresh parsley, chopped
▢ 2 teaspoons garlic, minced
▢ 1 teaspoon salt
▢ 3 mozzarella string cheese sticks
▢ Black olives, sliced into rounds
Instructions
1. Preheat your oven to 375°F (190°C) and line a baking sheet with parchment paper.
2. Slice the French bread into ¾-inch thick rounds or ovals and lay them cut-side up on the tray.
3. In a small bowl, mix the softened butter, minced garlic, chopped parsley, and salt until well combined.
4. Spread the garlic butter evenly over each slice of bread.
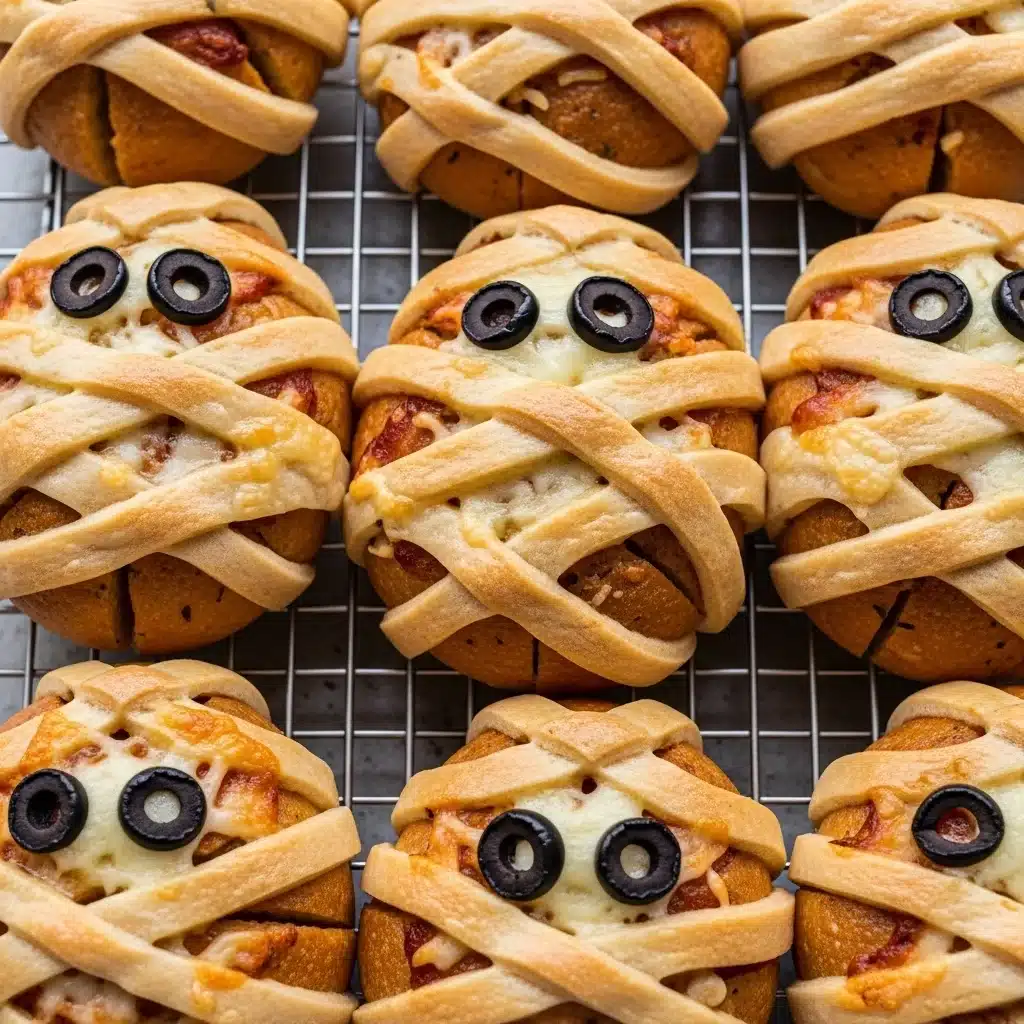
5. Peel the mozzarella string cheese into thin strips and crisscross them over each bread piece to create a mummy wrap effect.
6. Place two black olive slices near the top of each bread slice to create eyes.
7. Bake in the preheated oven for 10–12 minutes or until the cheese is melted and slightly golden. Serve warm.
Notes
Use slightly stale bread for a crispier base.
You can toast the bread for 5 minutes before adding cheese for extra crunch.
To make it vegan, swap in dairy-free butter and vegan mozzarella.
Leftovers can be stored in the fridge for 3 days or frozen and reheated in the oven.
- Prep Time: 10 minutes
- Cook Time: 12 minutes
- Category: Halloween, Appetizer
- Method: Baking
- Cuisine: American
Nutrition
- Serving Size: 1 slice
- Calories: 130
- Sugar: 0g
- Sodium: 180mg
- Fat: 8g
- Saturated Fat: 5g
- Unsaturated Fat: 2g
- Trans Fat: 0g
- Carbohydrates: 11g
- Fiber: 1g
- Protein: 4g
- Cholesterol: 20mg
Keywords: mummy garlic bread, halloween garlic bread, spooky snacks, halloween recipes, garlic bread ideas

Simple Ingredients, Scary Good Flavors
What You’ll Need for the Best Mummy Garlic Bread
The beauty of mummy garlic bread is how minimal and familiar the ingredients are. You don’t need anything fancy, just classic pantry staples and a few fun details to turn simple garlic bread into a spooky showstopper. Here’s what you’ll need:| Ingredient | Details |
|---|---|
| French bread loaf | 1 large, sliced into thick pieces |
| Butter | ½ cup, softened for spreading |
| Fresh parsley | 2 tablespoons, chopped finely |
| Garlic | 2 teaspoons, minced |
| Salt | 1 teaspoon, to taste |
| Mozzarella string cheese | 3 sticks, pulled into thin strips for mummy wrapping |
| Black olives | Sliced into rounds for eyes |
These are simple, budget-friendly ingredients you probably already have, especially if garlic bread is a go-to in your home. For added Halloween flair, you can even tint the butter slightly orange with a pinch of paprika.
Mummy Bread Variations and Substitutes
Need to tweak the recipe? No problem. Mummy garlic bread is ultra adaptable. Here are my favorite spins:
- Vegan Version: Use plant-based butter and vegan mozzarella strips. Violife or Miyoko’s melt beautifully.
- Gluten-Free: Swap the French loaf for a gluten-free baguette or bread roll, just make sure it’s sturdy enough to hold the cheese wrappings.
- Extra Flavor: Mix in roasted garlic or red pepper flakes into your butter for a punchier spread.
- Cheese Choices: No string cheese? Try cutting mozzarella slices into strips or even using shredded cheese and layering it like bandages.
At my workshop, one mom made these with pesto butter for a green “monster mummy” twist, and they were a huge hit with kids. Another guest added a sprinkle of parmesan before baking for an extra crispy top. These little tweaks make the recipe your own, and it’s easy to get inspired once you’ve tried the basic version.
And don’t forget, this recipe pairs beautifully with comforting fall flavors like the ones in Pumpkin Sourdough Bread or even the savory simplicity of Garlic Sourdough Toast.
Mummy garlic bread is more than a fun Halloween food, it’s a template for creativity, flavor, and a few ghostly giggles at the table.

How to Make Mummy Garlic Bread Like a Pro
Step-by-Step: Turning Bread Into Boo-tiful Mummies
Let’s bring those spooky little mummies to life, crispy, cheesy, and loaded with garlic flavor. You’ll love how fast this comes together, especially if you have little helpers eager to get their hands on the string cheese.
Here’s your mummy garlic bread roadmap:| Step | What to Do |
|---|---|
| 1 | Preheat oven to 375°F (190°C). Line a baking sheet with parchment paper. |
| 2 | Slice the French bread into ¾-inch thick rounds or ovals. Lay them cut-side up on the tray. |
| 3 | In a bowl, mix softened butter, minced garlic, chopped parsley, and salt. |
| 4 | Spread the garlic butter generously over each bread slice. |
| 5 | Peel string cheese into thin strips. Crisscross them over the bread to mimic mummy wrappings. |
| 6 | Add two olive slices to each piece for eyes. Press gently so they stick. |
| 7 | Bake for 10–12 minutes until cheese is melted and just golden. Serve warm. |
This whole process takes less than 25 minutes from start to finish. It’s especially fun to involve your kids during the “wrapping” and “eye placement” stages. They love giving the mummies quirky personalities!
Here’s a quick glance at the timeline:
- Prep time: 10 minutes
- Cook time: 12 minutes
- Total time: 22 minutes
- Yields: 10–12 mummy garlic breads
Want to speed it up? Try making this in an air fryer! Just preheat it to 350°F and cook for 4–5 minutes until the cheese starts to bubble. I’ve had great results with Air Fryer Bread, and this version works just as beautifully.
Pro Tips for Perfect Halloween Garlic Bread Every Time
To get the best results, keep these tips in your apron pocket:
- Don’t overload with cheese. Too many layers and the “mummy wrap” effect gets lost. Thin strips work best.
- Use day-old bread. Slightly stale bread crisps up better and holds its shape under the cheese.
- Toast the bread before assembling if you want a crispier base. A quick 5-minute pre-toast makes it sturdier.
- Add character. Tilt the olive eyes, overlap cheese haphazardly, imperfections make the mummies look even more alive.
At our bakery, these mummies are often served next to seasonal favorites like Zucchini Bread Recipe for a sweet and savory spread. Guests love nibbling between scary and satisfying!
The key to making mummy garlic bread unforgettable is having fun with it. After all, Halloween isn’t about perfection, it’s about playful creativity and tasty surprises.

Serve It Scary & Save the Leftovers
Creative Serving Ideas for Your Garlic Mummies
The fun doesn’t stop when the mummy garlic bread comes out of the oven, in fact, that’s just the beginning. Serving it right makes the whole experience feel even more magical (and delicious). Whether it’s a party or just a cozy October night at home, here are some of my favorite ways to present these little guys:
- Spooky Appetizer Platter: Arrange your mummies in a circle around a bowl of marinara “blood” sauce for dipping. Add some sliced veggies and themed toothpicks for extra flair.
- Lunchbox Hero: Wrap them in parchment with a handwritten “Happy Halloween!” note. My kids love showing them off at school.
- Bake Sale Showstopper: Line them up in a spooky bakery box, maybe with a few Sourdough Desserts tucked inside for contrast. They fly off the table.
- Soup & Mummy Night: Pair with tomato soup for a warm, comforting dinner after trick-or-treating. The dipping potential is unmatched.
Want to go all in on the Halloween vibe? Add a dessert option like Garlic Bread Lasagna to the mix. It sounds like a stretch, but the combo of sweet and savory, especially around the holidays, hits differently when everyone’s already in costume and laughter fills the air.
Let the bread be the star, but give it a stage that’s as festive as its cheesy grin.
Storing, Reheating & Repurposing Leftovers
Believe it or not, mummy garlic bread actually holds up pretty well after the party ends. Here’s how to make the most of it:
- To Store: Place leftover mummies in an airtight container and refrigerate for up to 3 days.
- To Reheat: Warm them in the oven at 350°F for 5–7 minutes or pop them in an air fryer for 3 minutes to revive that crispy edge.
- To Freeze: Flash freeze on a baking tray, then transfer to a zip-top freezer bag. Reheat straight from frozen at 375°F for 10 minutes.
- Repurpose: Slice into cubes and bake for 10–12 minutes to make garlicky croutons, perfect for fall soups and salads.
You can even reimagine leftovers into new dishes. One reader emailed me saying she layered her extra mummy bread into a cheesy baked casserole the next day. That’s the kind of spooky kitchen innovation I live for.
Halloween food should be practical too, and mummy garlic bread checks all the boxes. It’s festive, flexible, and no one will even think of throwing it away when there are this many ways to enjoy it again.

Conclusion
Mummy garlic bread is more than just a festive Halloween snack, it’s a memory maker. Whether you’re baking with your kids, prepping for a spooky gathering, or just want to bring some seasonal charm to the dinner table, this recipe delivers on flavor, fun, and smiles. From the crackly cheese bandages to those silly olive eyes, every piece tells a story.
And remember, baking isn’t about perfection. It’s about sharing, experimenting, and laughing through the mess. So tie on your apron, preheat that oven, and let the mummies march into your heart, and your kitchen.
Stay tuned for more Halloween-ready recipes, and check out the comforting Zucchini Bread Recipe or our Sourdough Garlic Toast next!
FAQs About Mummy Garlic Bread
Can I use pre-made garlic bread for this recipe?
Yes! Pre-made garlic bread works beautifully. Just add the mozzarella “bandages” and olive eyes before baking. It saves time while still looking (and tasting) fantastic.
How long does mummy garlic bread last?
Stored properly in an airtight container in the fridge, mummy garlic bread stays fresh for 3 days. For longer storage, freeze it and reheat directly in the oven when needed.
What other cheeses can I use for wrapping?
If you don’t have string cheese, you can slice mozzarella or even use provolone. The goal is to create thin, flexible strips that melt slightly but still hold a “bandaged” shape.
Can I make this in an air fryer?
Absolutely. Preheat the air fryer to 350°F and cook the assembled mummies for about 4–5 minutes. Check early to avoid overbrowning, especially around the olive eyes.
How do I keep the mummies from burning?
Watch the oven closely during the last 2 minutes of baking. Using parchment paper also helps prevent the bottoms from overcooking. Don’t bake at too high a temperature—375°F is the sweet spot.
for more recipes followo me in pinterest

