The Story & Intro
How I Started Baking Halloween Focaccia Art in My Foggy California Kitchen
Hi, I’m Marlene Quinn, and I never thought bread would become my favorite Halloween tradition. But every October in Mendocino, California, something magical happens in my kitchen. The fog rolls in, the pumpkins appear on porches, and I get the itch to create, right on dough.
My journey into Halloween focaccia art began with a failed pizza night. I had leftover focaccia dough, some wilting vegetables, and a bored child to entertain. I sliced a red onion into rings, tossed them on the dough, and my daughter said, “It looks like eyeballs!” We added olive spiders and pepper jack-o’-lanterns. The result? A spooky, edible masterpiece that made our whole house smell like rosemary and roasted garlic.
Now, every year, we make a new Halloween focaccia art scene, sometimes it’s a haunted graveyard, other times a witch flying past a mozzarella moon. It’s messy, imperfect, and ridiculously fun.
This isn’t just about bread. It’s about making something together, something you can actually eat. Whether you’re a sourdough purist or a yeasted-dough baker, this recipe brings Halloween spirit straight to your table. And the best part? You don’t need fancy tools, just a little imagination and your favorite toppings.
Ready to turn your oven into a haunted art studio? Let’s dive into this Halloween focaccia art recipe that’ll steal the spotlight at your spooky gathering.
Why Halloween Focaccia Art Is the Ultimate Edible Canvas
Why Bread Art Makes the Perfect Halloween Treat
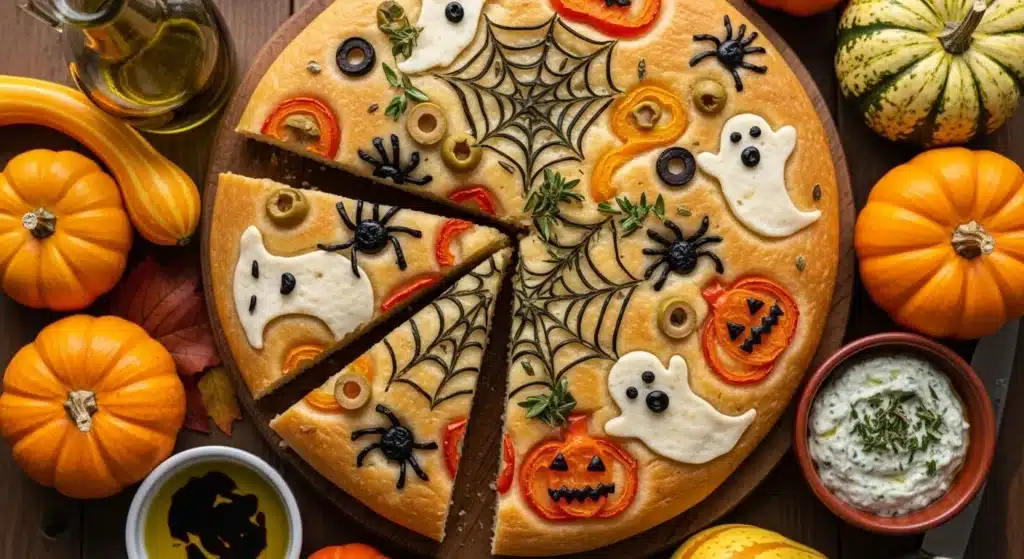
Halloween focaccia art is more than just a baking trend, it’s edible creativity. Each dough becomes a canvas, and with a few colorful veggies, herbs, and cheeses, you can craft eerie, charming, or downright hilarious scenes. From mozzarella ghosts to bell pepper pumpkins, it’s an activity that blends food with fun.
What makes this idea special is how easy it is to customize. You can go full-on horror with black olive spiders, or keep it cute with smiling cherry tomato bats. Plus, the base is soft, pillowy focaccia, hard to mess up, easy to devour.
Pair it with mummy garlic bread or Halloween cake pop flavors for a Halloween spread no one will forget.
Sourdough or Yeasted? Choosing Your Halloween Focaccia Base
Whether you’re team sourdough or prefer the speed of active dry yeast, Halloween focaccia art works with either. I often use Clementine, my trusty sourdough starter, to build flavor slowly overnight. But if time is short, yeast gives excellent results in just a few hours.
The only rule? Keep the dough well-oiled and dimpled. That classic focaccia texture is key to both flavor and visual appeal. Once your canvas is ready, decorate it with bold colors and Halloween flair.
Start with the sourdough focaccia base, then unleash your spooky side.
Print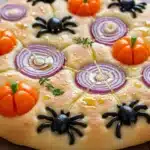
Halloween Focaccia Art – 5 Spooky Ideas You’ll Love
- Total Time: 1 hour 25 minutes
- Yield: 1 large focaccia 1x
- Diet: Vegetarian
Description
Create spooky and savory Halloween Focaccia Art using simple ingredients and creative toppings like olives, onions, and bell peppers. It’s perfect for kids, parties, and fall baking fun.
Ingredients
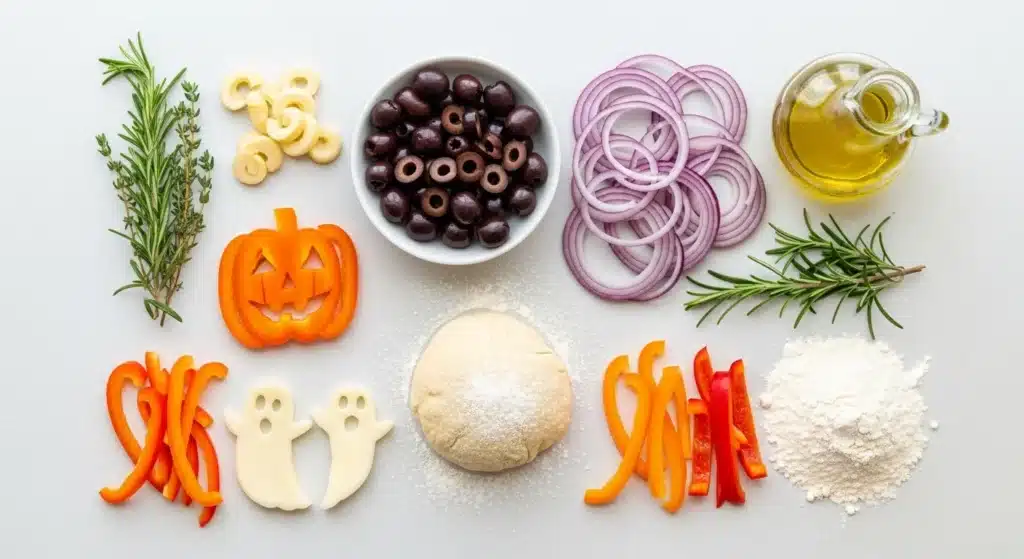
3 cups all-purpose flour or bread flour
1¼ cups warm water
1 packet active dry yeast or 100g sourdough starter
1½ tsp salt
¼ cup olive oil (plus extra for drizzling)
Assorted toppings: black olives, red onions, bell peppers, cherry tomatoes, fresh herbs, mozzarella
Instructions
1. In a large bowl, mix flour, water, yeast (or starter), and salt until a shaggy dough forms.
2. Let it rest for 30 minutes (or ferment overnight if using sourdough).
3. Stretch and fold the dough a few times, then transfer it to an oiled baking pan.
4. Let the dough rise until doubled, about 1–2 hours.
5. Preheat oven to 425°F (218°C).
6. Dimple the dough with your fingers, drizzle with olive oil, and arrange toppings to create your Halloween art.
7. Bake for 22–28 minutes until golden brown.
8. Cool slightly before slicing and serving.
Notes
Use cookie cutters to shape vegetables into spooky designs.
Add delicate toppings like cheese in the final minutes of baking.
Serve warm with dips or soup for a festive Halloween meal.
- Prep Time: 1 hour (or overnight)
- Cook Time: 25 minutes
- Category: Bread, Holiday
- Method: Baking
- Cuisine: American, Italian-inspired
Nutrition
- Serving Size: 1 slice (1/12)
- Calories: 190
- Sugar: 1g
- Sodium: 290mg
- Fat: 7g
- Saturated Fat: 1g
- Unsaturated Fat: 5g
- Trans Fat: 0g
- Carbohydrates: 28g
- Fiber: 2g
- Protein: 4g
- Cholesterol: 0mg
Keywords: Halloween focaccia art, spooky bread, edible art
How to Design Show-Stopping Halloween Focaccia Art
Simple Tools to Elevate Your Spooky Bread
Creating Halloween focaccia art doesn’t require fancy gear, just basic kitchen tools and a bit of imagination. Start with a good baking sheet, parchment paper, and olive oil. From there, let the fun begin.
Use small cookie cutters to shape bell peppers into ghosts or pumpkins. Kitchen shears work great for trimming herbs into tree silhouettes or witchy brooms. A toothpick or skewer can help you “draw” spider webs using a thin layer of tapenade or tomato paste.
And don’t forget your fingers. Pressing olives into dough for spider legs or poking in rosemary sprigs for a forest is half the fun.
You can prep your dough ahead (especially if you’re using a sourdough English muffin recipe base for a mini version), and let kids or guests build their own haunted bread boards before baking.
Ingredients That Scream Halloween (and Taste Amazing)
The beauty of Halloween focaccia art is that spooky also means savory. Some ingredient ideas that work well:
| Ingredient | Halloween Effect |
|---|---|
| Black olives | Spiders or eyeballs |
| Red onion rings | Witchy portals or eerie eyes |
| Orange bell peppers | Jack-o’-lanterns |
| Rosemary sprigs | Haunted forest trees |
| Cherry tomatoes | Bubbling cauldrons |
| Mozzarella slices | Melting ghosts |
| Charcoal salt | Adds contrast and shadow effects |
| Purple potatoes | Skull faces or spooky shapes |
Even leftovers can be useful. Got sourdough discard? Use it to make sourdough discard crackers and serve them alongside your focaccia for a full Halloween-themed snack board.
Looking for a slightly sweet option? Add roasted pumpkin cubes or turn your savory dough into a treat by using hints of spice, like what you’d find in our high-protein pumpkin bread.
Pro tip: Brush a bit of beet juice or paprika oil on your dough pre-bake for eerie color highlights that stay vivid after baking.
Focaccia Art for All Ages , Make Halloween Bread a Family Tradition
Involve the Kids: Spooky, Sticky, and Fun
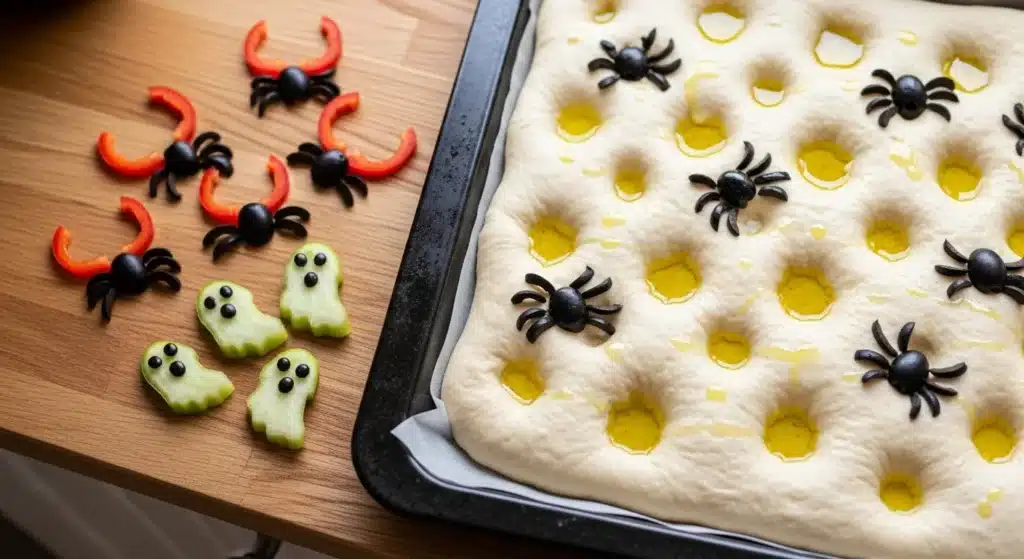
One of the best things about Halloween focaccia art is that it brings everyone to the kitchen. Kids love anything hands-on, and decorating dough with creepy ingredients hits the sweet spot between food and fun. Even picky eaters get excited when they can create their own edible monster.
Give them pre-cut ingredients like olive spiders, pepper “fangs,” and sliced mozzarella ghosts. Let them press designs into the dimpled dough. Whether it’s a smiling jack-o’-lantern or a graveyard made from rosemary and black garlic, they’ll be proud when it comes out of the oven golden and spooky.
This is a great way to introduce young bakers to dough shaping. They’ll start seeing food not just as something to eat, but something to create. You might even inspire a future baker, just like I was after my first failed boule.
For a twist, use sourdough discard dough to make mini personal-size focaccias, giving each child their own canvas. No more arguing over toppings!
Entertain the Adults: Bread Art as a Halloween Party Activity
Halloween focaccia art isn’t just for kids, it makes a unique party activity for adults too. Set up a focaccia bar with unbaked doughs ready to go, and offer a tray of colorful toppings: roasted garlic, caramelized onions, artichokes, peppers, herbs, cheeses, and edible flowers.
People love the hands-on experience, and the Instagrammable results. Encourage guests to vote on the best design or give themed awards like “Spookiest Forest” or “Cutest Monster.”
While the dough rises, sip mulled cider or snack on zucchini bread and cinnamon sugar soft pretzels. Once baked, everyone enjoys the warm, savory results of their spooky masterpieces.
It’s an easy, low-pressure way to add interactivity to a Halloween gathering, and unlike carving pumpkins, there’s no cleanup of gooey guts!
Pro Tips, Storage, and Serving Halloween Focaccia Art Like a Pro
Serving Tips: How to Make Your Spooky Bread the Star
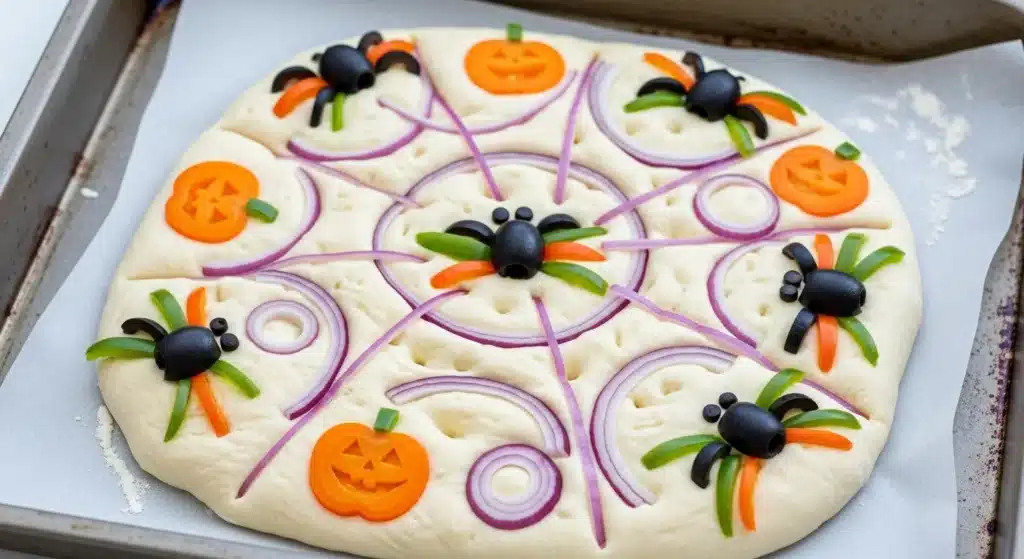
Once your Halloween focaccia art is golden, puffy, and piping hot, don’t just slice it, show it off. Let the loaf cool slightly to help the decorations set. Then place it on a large wooden board and let everyone admire the edible artwork before digging in.
Serve it alongside a fall soup (butternut squash or tomato basil work beautifully), or with herby whipped ricotta or hummus for dipping. You can even cube it for a Halloween charcuterie-style setup with spooky snacks.
Want to go extra festive? Present it with a “spellbook” menu describing each topping like potion ingredients. It’s a fun touch, especially for kids or Halloween party guests.
Pair your spooky bread with something sweet for contrast, like Halloween cake pops or a quick apple crisp for dessert.
Storing Halloween Focaccia Art: Keep the Magic Alive
Focaccia is best the day it’s baked, but leftovers can still shine. Store your Halloween focaccia art in an airtight container at room temperature for up to two days. To re-crisp the crust, pop slices in a toaster oven or skillet.
If you’ve gone all out on toppings, like cheese ghosts or roasted veggies, store any uneaten slices in the fridge, but bring them to room temp before serving again. The flavors bloom beautifully as they rest.
You can also freeze unbaked focaccia dough for a future Halloween project. Just let it come to room temp, stretch it in your pan, and decorate again. Dough holds up well, so making ahead is easy.
For bonus content, consider making sourdough versions with the perfect sourdough base or go wild with flavored versions like cheese sourdough bread. These variations add depth to the flavor and an extra layer of Halloween charm.
Conclusion: Create, Bake, and Share the Halloween Magic
Whether you’re a seasoned baker or just looking for a creative Halloween activity, Halloween focaccia art is a delicious way to celebrate. It’s spooky, satisfying, and surprisingly simple, even if you’re working with tiny hands or last-minute dough.
Remember: the goal isn’t perfection, it’s play. Use what you have. Make it yours. Laugh when the cheese ghost melts into a blob. Those are the moments your family will remember.
This year, skip the packaged snacks and make something magical from scratch. Your haunted masterpiece will not only feed your crowd, it’ll feed your creative spirit, too.
Frequently Asked Questions About Halloween Focaccia Art
1. What is Halloween focaccia art made of?
Halloween focaccia art starts with a focaccia dough base, either sourdough or yeasted. It’s then topped with vegetables, herbs, and cheeses arranged into spooky designs, like spiderwebs, pumpkins, or ghosts, to match Halloween themes.
2. Can I make Halloween focaccia art with store-bought dough?
Yes! You can use refrigerated pizza or bread dough as a shortcut. Just press it into an oiled baking pan, let it rise, and decorate it as you would with homemade dough. It’s a great option for busy days or last-minute baking.
3. How do I keep the decorations from burning while baking?
Brush toppings lightly with olive oil before baking, and avoid thin vegetable slices that burn quickly. You can also add delicate ingredients like cheese ghosts in the last 5–8 minutes of baking to prevent overbrowning.
4. Can I freeze Halloween focaccia art?
While you can freeze the baked bread, it’s best to freeze the dough separately and decorate fresh. If freezing leftovers, store slices in airtight containers and reheat in the oven for the best texture.
5. What are the best vegetables for decorating Halloween focaccia?
Bell peppers, black olives, cherry tomatoes, red onions, purple potatoes, and fresh herbs like rosemary or thyme work best. They hold their shape and color well during baking and add flavor, too.
for more recipes follow me in pinterest

